

You lift the jar at seven in the morning, expecting a lively dome, and find the same thick paste you left on the counter the night before. In a cold terraced house in York, that sight can make a new baker assume the culture has died. Often, it hasn't. A flat starter is usually a useful diagnostic signal, not a verdict.
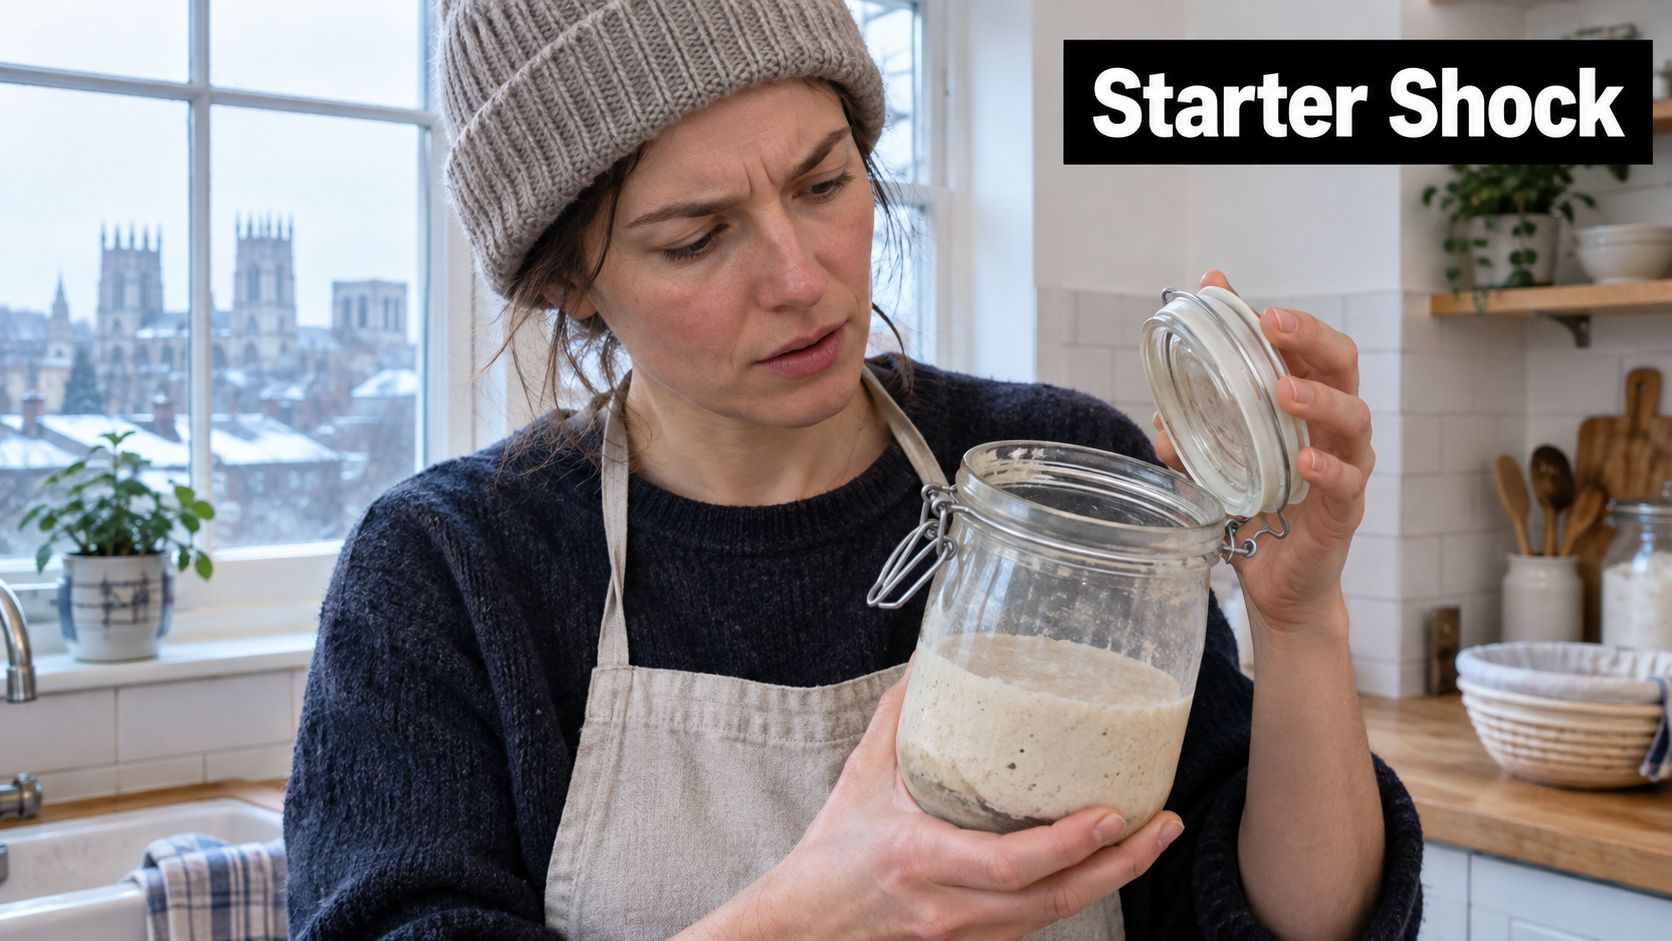
The culture inside the jar is responding to its conditions. Yeast and bacteria can slow down, stall, or produce gas that the mixture can't retain. The visible rise is the simplest clue, but the smell, texture, temperature, flour, and feeding history help explain it.
The sensible rescue is ordered, not random. Start with warmth, then make the feeding routine consistent, then adjust flour, hydration, and ratio one at a time. That approach gives your original culture a fair chance and prevents the common mistake of throwing it away before you've found the actual problem.
Table of Contents
- Why Your Starter Has Stopped Rising
- The Main Culprits Behind a Flat Starter
- Getting the Temperature Right in a UK Kitchen
- Feeding Ratios, Flour, and Hydration Fixes
- Step-by-Step Revival Routine for a Neglected Starter
- Tracking Rise and Knowing When It Is Ready
- Quick-Reference Rescue Checklist
Why Your Starter Has Stopped Rising
Your starter can look unchanged after a night on a cold kitchen worktop, yet still contain a living culture. Fermentation produces carbon dioxide, and the mixture must retain enough of that gas for the level in the jar to rise. BBC Bitesize explains that carbon dioxide is what lifts sourdough dough, so a flat starter usually has a problem with gas production, gas retention, or both.
Temperature is the first variable to check in a British kitchen. Doves Farm recommends room temperature, ideally 22–24°C, while UK sourdough guidance places useful fermentation around 21–26°C. Below 18°C, fermentation slows markedly, while wild yeast is most active around 24–28°C. The jar may just need a warmer position before you change the recipe.
Practical rule: Treat a flat jar as evidence to interpret. Change one variable at a time, rather than altering the flour, ratio, water, and temperature together.
Read the jar before feeding it
Check the glass for a high-water mark, even if the starter has already fallen. Bubbles at the sides, a gently domed surface, or a sharp acidic aroma shows that fermentation has taken place. A thin liquid layer often indicates hunger. A loose, soupy texture may mean the starter was fed heavily or has lost the structure needed to retain gas.
A young starter, or one recently removed from the fridge, may need several consistent feeds before its timing becomes reliable. UK troubleshooting guidance recommends keeping the flour, hydration, and feeding ratio identical for several feeds, marking the jar, and judging repeated rise rather than relying on the clock.
Rescue the culture, not your anxiety
Work through the likely causes in order. Warm the jar first and observe it. If it remains flat, check how much starter you retained and whether the feeding ratio is repeatable. Test the flour and water only after those checks. This sequence protects the original culture and makes each result useful. A cold starter can appear weak despite sound feeding, while a well-fed starter can still stall on a chilly worktop.
An acidic, vinegary, or faintly acetone-like smell usually points to hunger rather than a dead culture. Pink, orange, or furry growth is different. Discard the starter if those signs appear; otherwise, diagnose it before starting again.
The Main Culprits Behind a Flat Starter
A jar can look lifeless for several different reasons. Before discarding it, match the visible symptom to the likely cause and change one variable at a time.
| Symptom | Most Likely Cause |
|---|---|
| Sharp acetone smell or a thin liquid layer | The starter is hungry and has gone too long between feeds |
| Soupy texture with little structure | Too much retained starter, excess hydration, or an overextended culture |
| No visible bubbles after several hours | Low temperature, immature culture, or inconsistent feeding |
| Sudden rise followed by collapse | Fermentation happened, but the starter passed its peak before you checked |
| Floury or dull aroma with weak activity | Flour may be old, weak, or providing a poor food source |
| Bubbles under a tight lid but little visible expansion | Gas pressure is trapped or the jar is too full |
| Pink, orange, furry, or putrid growth | Contamination. Discard the culture |
Hunger and overfeeding look different
A hungry starter may smell of acetone or strong vinegar, with a thin liquid layer or crust on top. Hooch signals hunger, not automatically a dead culture. Pour it off or stir it in, then give the starter a measured feed.
An over-fed or poorly balanced starter can look watery and collapse before you check it. Retaining too much old culture leaves the mixture acidic and depleted, while a large feed can dilute the organisms and delay visible activity. Weigh a smaller amount of starter and use the same feeding ratio for several feeds. That gives fresh flour more influence and makes the result easier to judge.
Temperature is often the UK explanation
Below 18°C, fermentation may continue without producing an obvious rise within your expected timeframe. A cool worktop can therefore make a healthy culture appear weak. Move the jar to gentle, stable warmth before changing the flour or throwing away the original starter.
Water and flour can also affect activity. Chlorinated water may inhibit fermentation in some kitchens, while very soft water can leave the mixture slack. Old or weak flour may provide less useful structure and food than fresh strong flour or wholemeal rye.
A tightly sealed jar creates another misleading symptom. Gas can build under the lid while the starter barely expands, so use a cover that keeps dust out but allows pressure to escape. Leave room for growth, and use a clean jar and utensils. Poor hygiene can introduce unwanted growth that no feeding ratio will repair.
Pink, orange, furry, or putrid growth is a clear discard signal. A sharp acidic smell, separated liquid, or a flat surface is usually a reason to diagnose the culture first. This sequence preserves the original starter and avoids restarting before the simple causes have been tested.
Getting the Temperature Right in a UK Kitchen
A starter that looks dead on a winter worktop may be fermenting too slowly to rise on your timetable. Temperature is the first adjustment I make before changing flour, water, or feeding ratio. Doves Farm suggests 22–24°C for a starter, while Domson's UK guidance places optimal fermentation around 21–26°C. In a cool UK kitchen, gentle warmth can revive the original culture without forcing you to discard it.

Find gentle warmth first
Choose the warmest stable place available, rather than the hottest one. Suitable options include:
- On top of the fridge: Check that the surface feels warm, not hot.
- Near a radiator on a windowsill: Keep the jar from touching the radiator.
- In an airing cupboard: Use the steady surrounding warmth.
- In an oven with only the light on: Confirm that the oven is not heating before putting the jar inside.
- In a cool box: Place a warm, not boiling, hot-water bottle beside the jar, separated by a cloth.
A cheap probe thermometer makes this easier to judge. Measure the surrounding spot or the starter, then move the jar if needed. Direct sunlight can overheat a small culture, while a radiator above 30°C may weaken it instead of reviving it.
Match the ratio to the room
For an active feed, aim for roughly 24–27°C. An overnight build works more slowly at 21–24°C. If the jar is colder, give fermentation more time rather than adding food every few hours. Repeated feeding can dilute a culture that has not yet had time to work.
At about 26°C, a starter may rise within roughly 10 hours; below 18°C, wild yeast can become very sluggish. Warm the jar and observe it through several consistent feeds before changing another variable.
A stable, moderate cupboard is more useful than a dramatic burst of heat.
Loosely cover the jar and mark the starting level. If it rises after relocation, temperature was probably the main issue. Keep the flour, water, and ratio unchanged for the next few feeds so the result confirms the diagnosis.
Feeding Ratios, Flour, and Hydration Fixes
Once temperature is sensible, control the feed. Weigh the starter, flour, and water rather than estimating with spoons. A small culture is easier to read, wastes less flour, and lets you compare one cycle with the next.
Use the ratio as a timing tool:
| Ratio (Starter:Flour:Water) | Sample Weights | Best For | Expected Rise Time |
|---|---|---|---|
| 1:1:1 | 20g starter, 20g flour, 20g water | Regular maintenance and a quick refresh | Faster fermentation in a warm spot |
| 1:2:2 | 20g starter, 40g flour, 40g water | A steady build with more fresh food | Moderate timing, depending on warmth |
| 1:5:5 | 10g starter, 50g flour, 50g water | Sluggish or recently chilled starters | Slower, longer fermentation window |
A useful explanation of the feeding process and ratio logic appears in this guide to feeding a sourdough starter without killing it.
Start with a manageable feed
For ordinary maintenance, 1:1:1 is straightforward. For a build that needs more food and a longer window, use 1:2:2. If the starter has been neglected or kept in the fridge, retain a small amount and give it a larger feed, such as 1:5:5, rather than carrying a large, acidic portion forward.
Wholemeal rye is often the most useful kickstart flour because it brings minerals and enzymes that support a lively fermentation. Once the starter is clearly active, move gradually towards strong bread flour if that gives you the texture and timing you prefer.
Keep hydration predictable
A 100% hydration starter uses equal weights of flour and water. That makes a thick batter-like mixture and gives you a familiar baseline. If your cold kitchen produces a loose starter that races through its food and collapses, reducing hydration to around 80% can make the mixture firmer and easier to read.
Use slightly warm filtered water, around 26–28°C, when the surrounding room is cold. The water shouldn't feel hot. The aim is to bring the mixture into a suitable fermentation range, not to shock it.
Change one lever at a time. If you move from white flour to rye, alter nothing else for the next feed. If you change hydration, keep the flour and temperature steady. That discipline tells you which adjustment worked.
Step-by-Step Revival Routine for a Neglected Starter
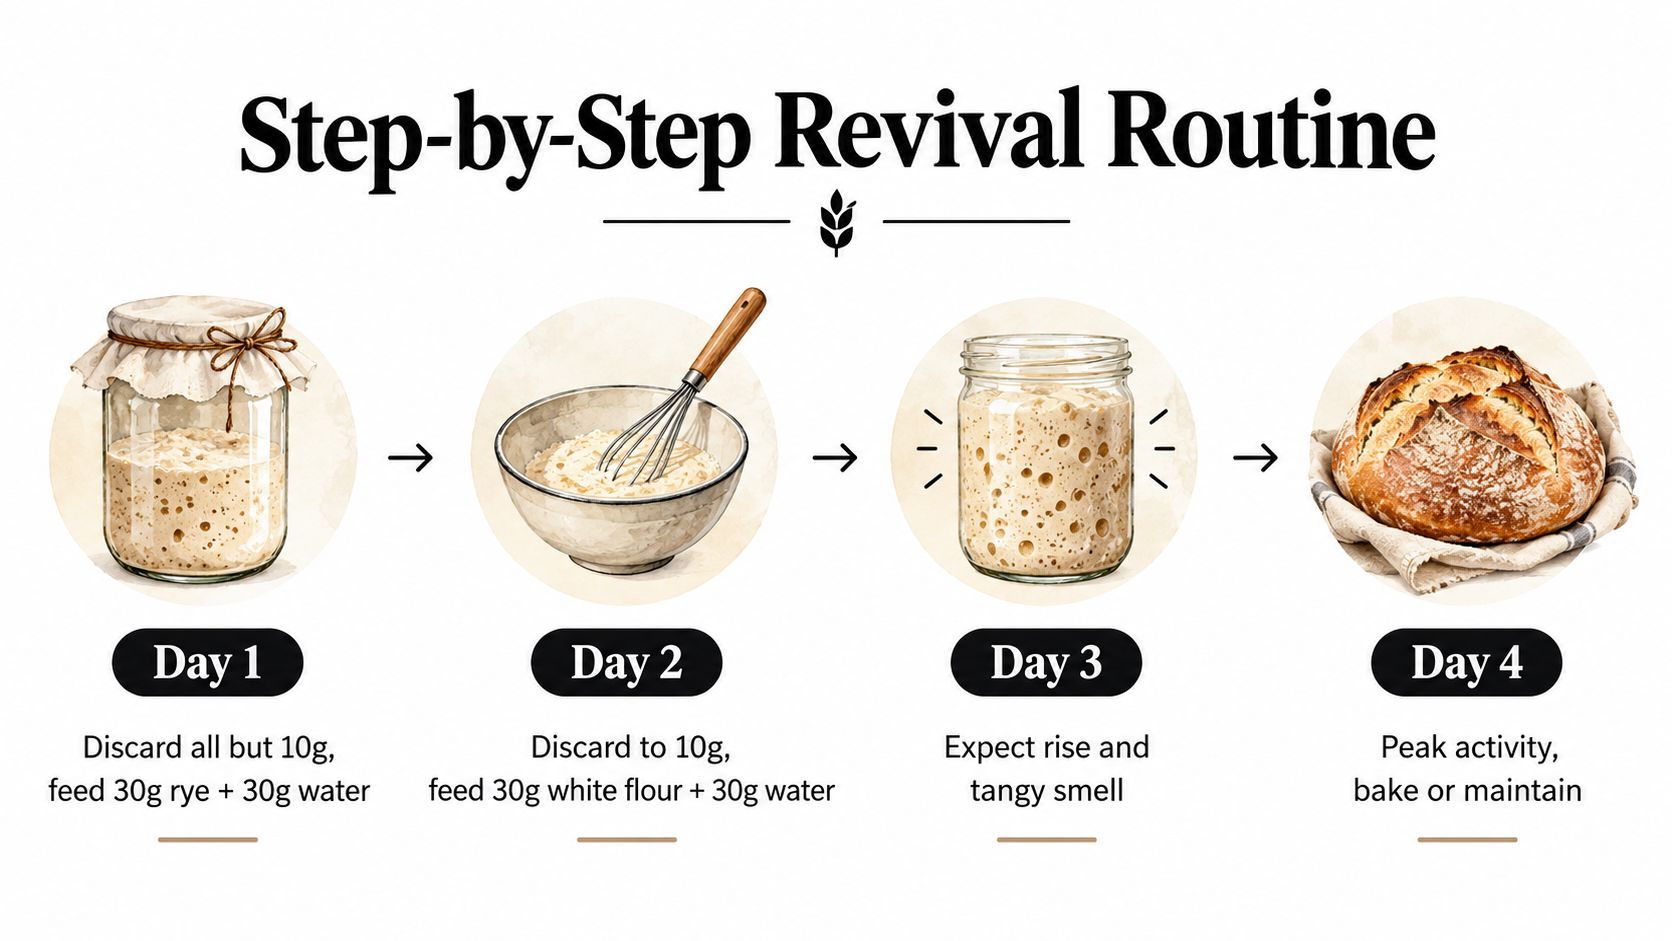
A neglected starter with hooch, a sharp smell, or weeks of fridge storage often needs repeated refreshment rather than a single heroic feed. The routine below keeps the retained culture small and gives rye flour a chance to restart activity.
Day 1
Pour off any dark liquid if you prefer not to mix it back in. Transfer 10g starter to a clean jar and add 30g rye flour and 30g water. Stir thoroughly, scrape down the sides, mark the level, cover loosely, and keep it close to 26°C.
The starter may show little change at first. A sharp vinegar or acetone aroma can occur during revival and usually indicates hunger rather than contamination.
Day 2
If liquid has collected, pour it off. Return to 10g starter, then add another 30g rye flour and 30g water. Look for fine bubbles around the sides, a slightly aerated texture, or a small rise. Don't judge the culture by one quiet interval.
If there are no signs of activity, repeat the same feed rather than changing flour, hydration, and temperature together.
Day 3
When bubbles appear, use a 1:2:2 feed. Split the flour between rye and strong bread flour, then add the matching weight of water. This begins the transition towards a more predictable white-flour starter without removing the useful boost from rye too quickly.
If the jar remains completely inactive, repeat the Day 2 rye feed and keep the temperature steady. A staged approach to revitalising a living culture is also described in this sourdough starter troubleshooting guide.
Day 4
Build with bread flour at 1:4:4 and observe the peak. A useful test is whether the starter can double within 4–6 hours in a warm environment, though the jar's actual behaviour matters more than a rigid deadline.
Normal revival smells include vinegar, acetone, and a cheesy tang. Pink, orange, furry, or putrid growth means discard the starter rather than trying to rescue it.
The following demonstration shows how feeding and activity can be assessed in practice.
Don't increase the feed just because the starter looks slow. Let each cycle reveal whether the culture is producing and retaining gas. If it is, patience is more useful than another drastic change.
Tracking Rise and Knowing When It Is Ready
A starter can rise and fall between checks, so a jar that looks flat doesn't always lack activity. Mark the level immediately after feeding with a rubber band or sticky note. Then record the feed time, the highest point, and how long the starter took to reach that peak.
A simple note might read: feed, level, peak, smell, texture. After several cycles, you'll have a pattern rather than a guess. This is particularly helpful in a UK kitchen where the room temperature changes between daytime and overnight.
Look for several signs together
A healthy, bake-ready starter should show:
- Visible expansion: It rises clearly above the marked feed line.
- Gas throughout: Bubbles appear at the sides and within the mixture.
- A rounded top: The surface domes while rising, then may flatten or turn slightly concave at peak.
- A pleasant aroma: Tangy, yeasty, or lightly acidic is reassuring.
- A responsive texture: Tapping the jar reveals movement and trapped gas.
A doubling within 4–6 hours at 24–26°C is a practical benchmark from UK starter guidance, but don't use the clock alone as proof. This guide to feeding frequency also emphasises observing the starter's condition and routine.
The float test can be a final check, but it isn't conclusive by itself. A starter may float because it has trapped gas without having the strength or timing you need, while a lively starter can fail the test if handled differently. Reliable repeated rise, a domed peak, and a pleasant smell give you better evidence.
When you see the same pattern across successive feeds, use the starter near its peak or just as it begins to soften. That consistency is what translates into more dependable dough fermentation and oven results.
Quick-Reference Rescue Checklist
Print this beside the jar and tick each item before making another change.
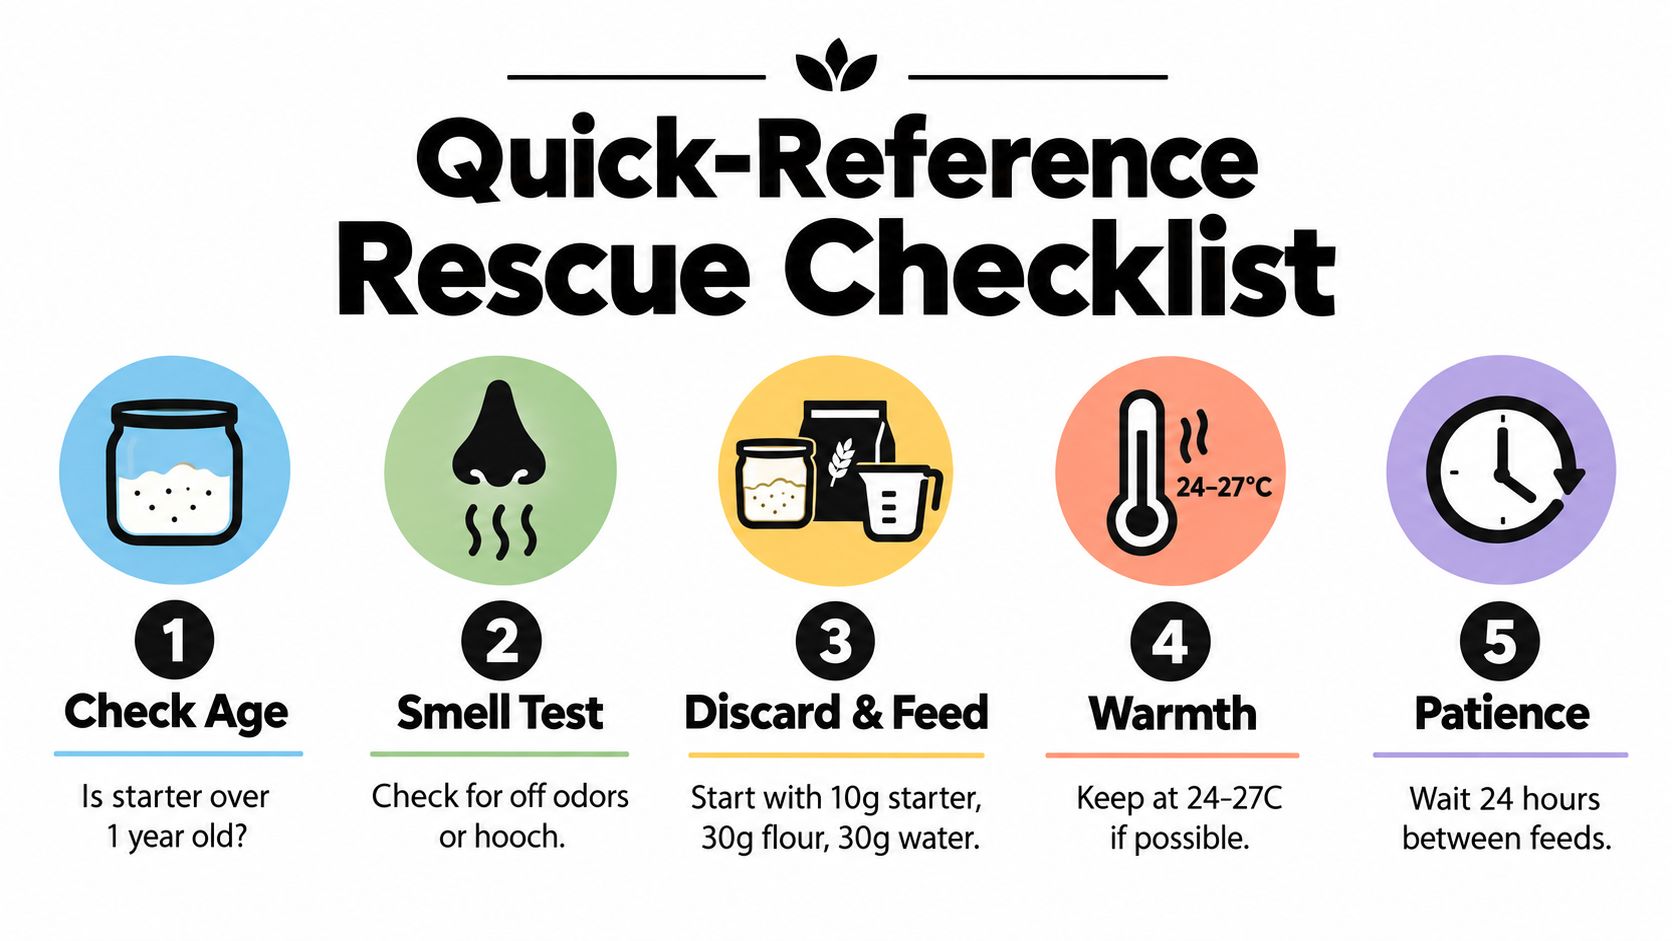
- Check the culture: Keep the original starter unless you see pink, orange, furry, or putrid contamination.
- Check hunger: Hooch or an acetone smell signals hunger, not death. Pour off the liquid if desired, then feed.
- Reduce the carryover: Retain 10g starter in a clean jar before a revival feed.
- Warm the jar: Hold the culture around 24–26°C, using a cupboard, oven light, or another gentle warm spot.
- Feed consistently: Add 30g flour and 30g water to 10g starter for a controlled refresh.
- Use rye for recovery: Choose wholemeal rye while the culture is sluggish, then transition towards strong bread flour after bubbles return.
- Increase the ratio when needed: Try 1:5:5 with strong flour for a weak or recently refrigerated starter.
- Wait between feeds: Give the jar time to show a peak instead of feeding repeatedly by the clock.
- Mark the level: Use a rubber band or sticky note and record feed time, peak height, and smell.
- Confirm activity: Look for repeated rise, visible gas, and a domed or slightly concave top before baking.
If the starter still shows almost no activity after several consistent feeds, review temperature first, then starter age or recovery, feeding ratio, flour, and water. That troubleshooting order is recommended in UK sourdough guidance.
The Sourdough Cult offers live sourdough starter, practical starter kits, rise-tracking jars, and clear feeding guidance for UK home bakers who want a dependable culture without unnecessary equipment. If your own jar won't recover after a careful rescue routine, visit The Sourdough Cult to find a straightforward starter or kit that fits your baking setup.


