

You've fed your starter, cleaned the jar, and marked the level. Hours later, it has risen, bubbled, and developed a distinctly sour smell. You tilt the jar towards the kitchen window, check the time since feeding, and wonder whether to mix your dough now or scrape it down and feed it again.
Beginners often get trapped between two rules here. One says you must use the starter at the precise instant of maximum height. Another says any bubbling starter is ready. Neither is dependable on its own. Readiness is a timing window, and missing that window in a cool UK kitchen is very different from missing it in a warm one.
Table of Contents
- The Moment You Stand Over Your Jar
- Visual and Smell Cues That Signal Readiness
- The Float Test and Why Rise Tracking Beats It
- How Temperature and Feed Ratio Change Peak Time
- Your Pre-Bake Readiness Check
- Troubleshooting Starters That Look or Smell Off
- A Simple Routine for Every Bake
The Moment You Stand Over Your Jar
Your jar has risen, the surface is lively, and the recipe says it is time to mix. In a cold UK kitchen, that may be premature. On a warm summer worktop, the same starter may already have peaked and started to fall. Readiness is a timing window shaped by your kitchen temperature and feeding ratio, not a single height or clock time.
A starter can look active without providing dependable leavening strength. It can also have passed its highest point while still holding enough gas to use. Judge the culture by the pattern it repeats after feeding: how quickly it rises, how long it holds, and whether it follows a similar cycle under the conditions you bake in.

Fresh flour and water feed a mixed microbial culture. Yeast produces carbon dioxide, while lactic-acid bacteria and other microorganisms produce acids. The Federation of Bakers' sourdough guidance describes sourdough as spontaneous fermentation of cereal starch, usually wheat or rye, by a culture containing both lactic-acid bacteria and yeast.
That biology explains why early bubbles do not guarantee useful rise. A starter may double and collapse before you mix, or rise slowly because the room is cool. A larger feed ratio can lengthen the wait, while a warmer room shortens it. Mark the jar, note the feed ratio and room conditions, then use the next cycle as your reference.
Before using it, check for contamination. Discard the culture if you see mould or pink, orange, or otherwise unusual discolouration, rather than scraping off the surface. A clean, clearly marked sourdough starter jar for a UK kitchen makes changes easier to track. Your judgement comes from what happens after each feed, not from a universal rule repeated online.
Visual and Smell Cues That Signal Readiness
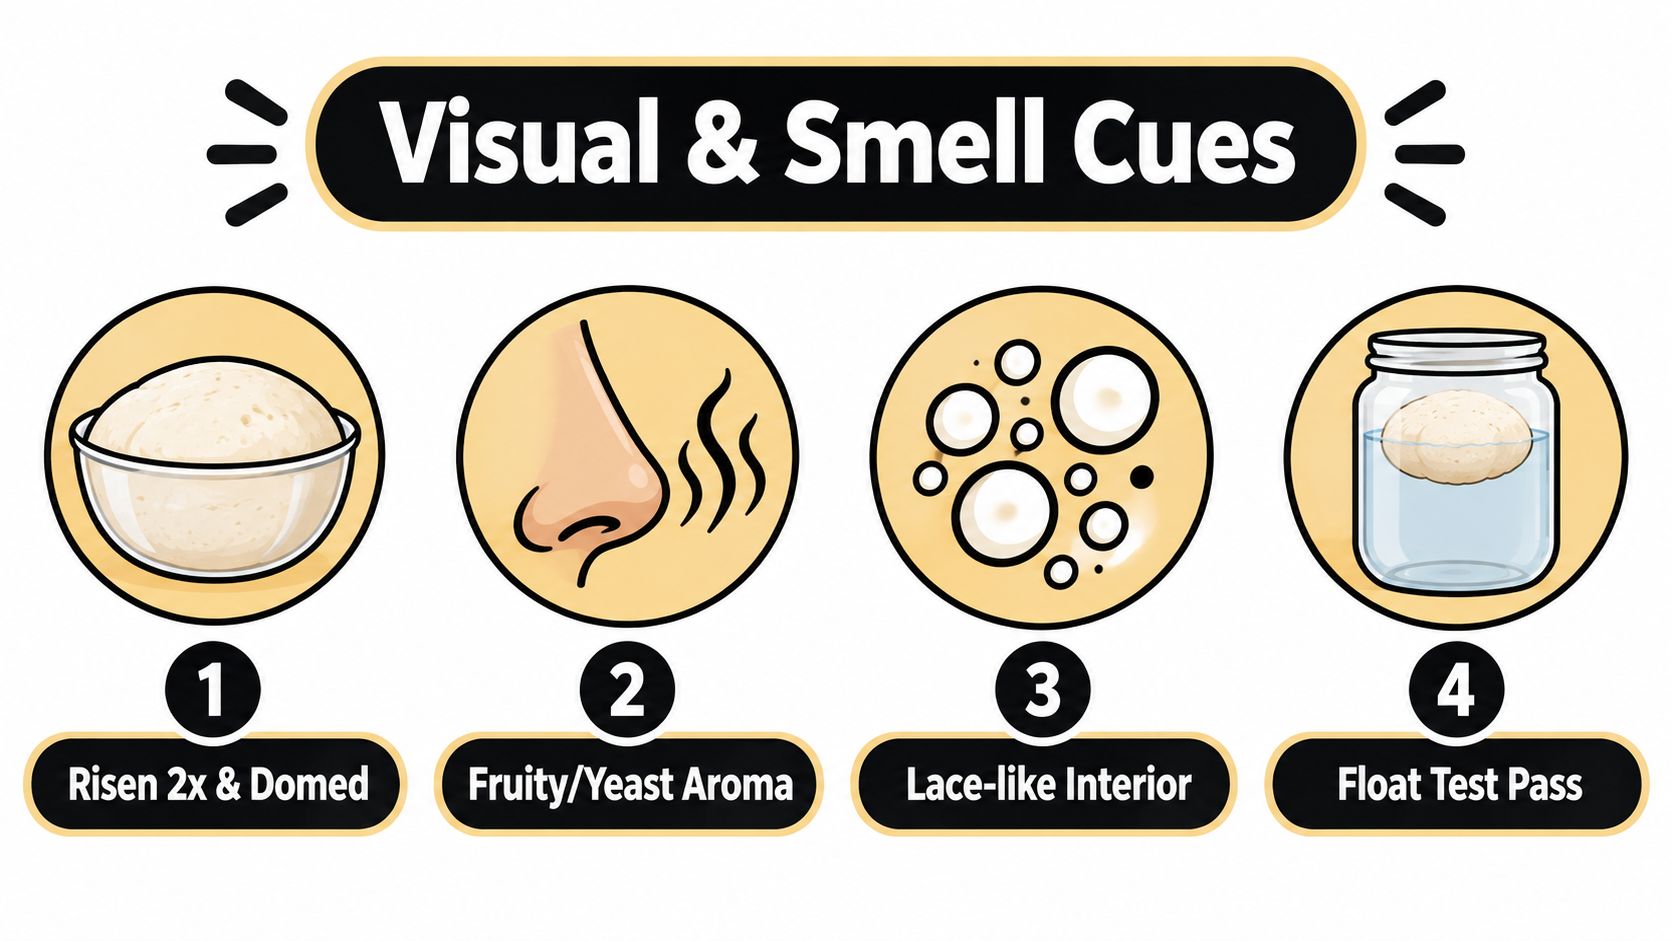
A starter near peak activity usually has a rounded or slightly domed top. The dome may hold its shape when you move the jar gently. A flat surface can mean the starter is still building gas or has finished rising. A concave surface, with streaks marking a higher level on the glass, shows that it has started to recede.
Inspect the jar from the side before stirring. Readiness is more convincing when bubbles run through the mixture, rather than forming only a frothy cap. Small bubbles may create a lace-like pattern against the glass, while larger pockets can break when you nudge the jar. Gas production and acidification both matter, as the Federation of Bakers' guidance explains, so a wet, bubbly surface is only part of the assessment.
What the texture tells you
Scoop out a little starter. Near peak activity, it should look aerated and stretchy, with a web-like structure that pulls away from the spoon instead of running like thin batter. A stiff culture may show less visible volume, so judge its texture alongside its rise. A watery layer over dense paste suggests that the starter is hungry or has passed its peak.
Smell the sample as well. A fresh acidic, sour-yeasty, yoghurt-like, or mildly fruity aroma supports the visual evidence. A sharp solvent or nail-polish smell usually indicates a hungry culture that needs feeding, rather than one ready to raise dough. Aroma varies with the culture and fermentation conditions, so use it as supporting evidence.
Practical rule: A domed surface, bubbles throughout the jar, an aerated texture, and a clean acidic aroma give you a stronger readiness check than any single cue.
Use your hand for one final check. Lift a spoonful, tilt the spoon slightly, and watch for visible strands before it drops slowly. It should feel light and inflated, not heavy, watery, or slack. If the jar has risen substantially and the dome remains intact or has only started to flatten, you are within its useful timing window. That window depends on the temperature and feed ratio recorded for your own kitchen, particularly in a cool UK room or during warmer weather.
The 60-second clip below shows the stretch and slow drop described above, making those signs easier to recognise.
The Float Test and Why Rise Tracking Beats It
You can drop a spoonful of starter into room-temperature water and watch it sink. That result does not automatically mean the jar is weak or unready. The float test measures one small sample at one moment, while readiness depends on how the whole culture has risen and where it is in its fermentation window.
A thin starter may float because bubbles cling to it, even when it has not produced a dependable rise. A thick starter may sink because its texture is dense, despite rising consistently in the jar. Stirring can also break the structure you needed to judge. Use the float test as supporting evidence, not as a pass or fail.
Rise tracking gives you a record. Feed by weight, mark the starting level with a rubber band or washable marker, and note the jar height at regular intervals. The guidance on diagnosing a sourdough starter that isn't rising becomes more useful as a log. Record the feed ratio, room temperature, maximum rise, and the point when the surface begins to flatten.
For a controlled household test, a 1:5:5 feed held at approximately 25°C should reliably double within 8–12 hours, while a vigorous culture may peak in 4–6 hours, according to UK sourdough technology guidance. Treat those figures as reference conditions, not promises. Your jar's repeated behaviour matters more than matching another baker's schedule.
In a cool UK kitchen, record the actual temperature rather than assuming an overnight feed will peak by morning. A warm summer room can shift the useful window earlier. Also inspect the culture before baking. Any visible mould or unusual pink or orange discolouration is a contamination warning, so do not rely on a float result to approve it.
| Method | Reliability | Best for |
|---|---|---|
| Float test | Useful as a supporting signal, but affected by texture, stirring, and trapped surface gas | A final spot-check when the starter is visibly near peak |
| Rise tracking | Strong household evidence because it records expansion, timing, and collapse | Learning when your particular culture peaks |
| Combined approach | Most useful when both tests agree with the visual and smell cues | Confirming a bake decision without treating one sign as a pass or fail |
Use the float test at the end. If the starter has risen predictably, looks aerated, and has a rounded surface, floating can add confidence. If it sinks while the jar history is strong, keep the healthy culture and trust the recorded rise.
How Temperature and Feed Ratio Change Peak Time
Your starter's peak is a timing window, not a fixed appointment. It depends on the temperature of the jar and the amount of fresh flour and water in each feed. A small refresh leaves more mature culture relative to its food, so fermentation usually moves faster. A larger refresh dilutes the carry-over acidity and gives the microorganisms more food to process, extending the rise.
Temperature changes the schedule just as sharply. Fermentation slows in a cool UK kitchen and accelerates in a warm room. UK starter-maintenance guidance places vigorous activity around 24–28°C, while cultures become noticeably sluggish below 18°C according to this sourdough starter maintenance guidance. An overnight feed therefore means different things in different kitchens. At 18°C, the same culture may need roughly half as much time again as it would at 25°C. Apply the earlier 1:5:5 benchmark to your own room rather than copying another baker's clock.
| Feed ratio | 16°C cool kitchen | 21°C room temperature | 26°C warm kitchen |
|---|---|---|---|
| 1:1:1 | Longer and often unpredictable | Moderate rise time | Shorter rise time |
| 1:2:2 | Longer than at room temperature | Moderate to extended window | Faster than at room temperature |
| 1:5:5 | Longest window | Extended window | More predictable, but still longer than a smaller feed |
The table shows direction, not a promise. Flour type, hydration, starter strength, and jar shape all affect the visible rise. A stiff starter can ferment actively while gaining less height, whereas a wetter starter may expand dramatically without forming a clear dome. Mark the jar after feeding and judge the peak against its own previous behaviour.
Build your own peak map
Use the same ratio for several feeds, then:
- Mark the jar immediately after mixing.
- Record the feed time, room temperature, and flour used.
- Note when the starter reaches maximum height and when the dome begins to flatten.
Keep a safety check in the routine. Before adjusting your timing, inspect the surface and sides of the jar. Visible mould or pink or orange discolouration means the culture is contaminated and should not be used, regardless of how quickly it rises.
This guide to how often to feed a sourdough starter is easier to apply once you have timing notes from your own kitchen. Use those records to predict when the jar will be near maximum expansion, then choose a smaller feed for a shorter window or a larger feed for a longer one.
Your Pre-Bake Readiness Check
You are standing over the jar with flour and water ready to mix. Run the checks in the same order each time, using the starter's rise history, condition, and timing together rather than letting one impressive test decide the bake.
Five checks before adding the starter
- Confirm the rise. Check the mark made after feeding. The starter should have expanded substantially, ideally reaching at least double under a repeatable refresh. Height matters less than whether this culture has shown comparable growth over consecutive feeds.
- Inspect the top and sides. A convex or slightly domed surface shows that gas is still holding the structure. A flat top can be usable if the starter has only just reached it. A concave top and streaks on the jar suggest that it has started to recede. In a cool or damp UK kitchen, also check the surface and sides for visible mould or pink or orange discolouration. Discard a contaminated culture, regardless of its rise.
- Smell the jar. Look for a clean acidic or sour-yeasty aroma. A solvent-like smell usually indicates that the culture is hungry or has gone too long between feeds, so treat it as a timing warning rather than a ready-to-bake signal.
- Compare the timing. Use your log, not the recipe's assumed schedule. If the starter peaked near the time expected for your kitchen and is only beginning to flatten, you are in a sensible working window. If it peaked much earlier, refresh it before relying on it for new dough.
- Use water as a cross-check. Drop in a teaspoon without stirring the jar first. A floating sample supports the other observations, but a sinking sample does not overrule a strong rise record and a healthy peak shape.
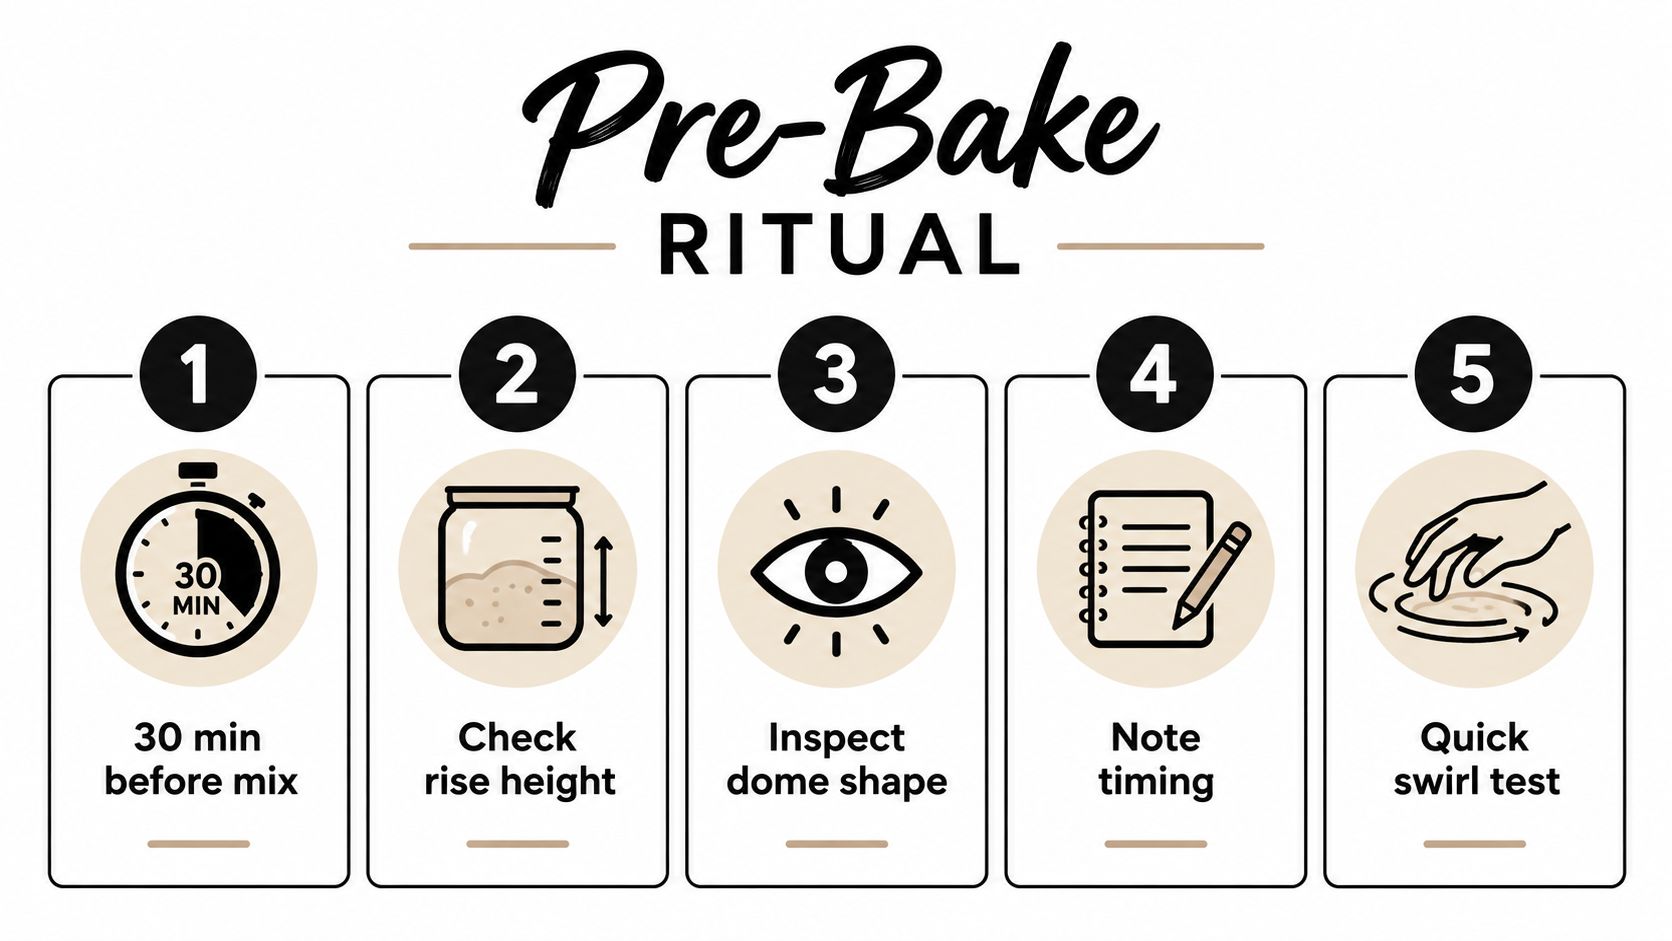
Treat this as a layered check, not a pass-or-fail exam. A starter can miss one indicator for an innocent reason. A stiff culture may not form an impressive dome, while stirring can release the bubbles needed for a float test. If the signals disagree, return to the rise record, peak shape, smell, and safety check before changing the recipe.
If the established pattern breaks, pause the bake and diagnose the starter before asking the dough to compensate.
Troubleshooting Starters That Look or Smell Off
A jar that behaves differently in a cold UK kitchen is not automatically spoiled. Temperature, flour, hydration, feed ratio, and the gap between refreshments can all shift the timing. First decide whether the culture is just underactive or hungry, then check for contamination before changing your baking plan.
When the culture is slow or hungry
A starter that barely moves after feeding needs observation, not immediate disposal. Check that the flour and water were weighed consistently, then place the jar somewhere moderately warmer and use a tighter refresh for the next cycle. A 1:1:1 feed often makes activity easier to see because it contains more established culture than a larger, more dilute refresh. Record the room temperature, since a cold kitchen can extend the window considerably.
A starter may also rise and fall while you are asleep or away. Streaks on the jar and a concave surface show that fermentation has already progressed, even if the culture looks flat now. Shorten the interval before the next inspection, or choose a larger refresh when you want the peak to arrive later.
Acetone or nail-polish remover suggests hunger. A strong vinegar aroma can point to a high-acid, underfed culture rather than a balanced baking peak. Refresh it and observe the next cycle. A brown or grey liquid layer, often called hooch, can form on a hungry starter and does not by itself prove spoilage.
Slow is a scheduling problem. Unusual colour or fuzzy growth is a safety problem.
When to discard
Pink or orange discolouration, fuzzy mould, or other clearly abnormal growth means the culture should go in the bin. The starter microbiology guidance from Domson identifies pink and orange colour changes as contamination warnings. Do not refresh a starter showing these signs and hope the next feed will correct it.
Discard the whole culture, then clean and sterilise the jar before starting again with fresh flour. Scraping off one patch is not a safe recovery method because contamination may extend beyond the area you can see. A persistent foul smell alongside mould or unusual colour confirms that this is a discard decision, not a rescue attempt.
Sourdough acidity makes the culture less favourable to mould, but it is not a steriliser. Any fuzzy growth or pink-orange pigment means the culture is gone, whatever the smell. The Federation of Bakers' explanation of fermentation and sourdough acidity provides useful background on why acidity develops, but visible contamination still overrides fermentation activity.
A healthy starter that is merely slow can return to your normal baking routine after several consistent refreshes. A contaminated starter cannot. Keeping those decisions separate prevents two costly mistakes, discarding a recoverable culture because the kitchen is cold, or trying to rescue one with clear safety warnings.
A Simple Routine for Every Bake
Treat readiness as feed, rest, watch, decide. That four-part routine works better than writing “feed overnight” on a recipe because it leaves room for the temperature and ratio in your own kitchen.
- Feed: Use a weighed ratio and mix thoroughly. Mark the starting level on a straight-sided jar.
- Rest: Keep the jar away from major temperature swings and note the room temperature.
- Watch: Look for expansion, bubbles throughout, and a rounded surface. Record when the dome begins to flatten.
- Decide: Use the starter while it is near maximum expansion, or refresh it if it has clearly collapsed and your rise record shows that the peak has passed.
For a Saturday morning bake in a 21°C kitchen, a sensible approach is to feed on Friday evening, mark the jar, and inspect it in the morning rather than assuming it will peak at a particular hour. If it has risen substantially and is holding a dome, mix. If it has barely moved, the room, ratio, or culture strength has extended the window. If it has peaked and receded, use your previous records to decide whether it remains aerated enough for your dough or needs another refresh.
A marked jar makes this habit easier. The Sourdough Cult offers live starter, starter kits, rise-tracking jars, and written care guidance, so its products are one option for bakers who want a supplied culture and a physical way to monitor expansion.
The calendar can suggest when to feed, but the jar decides when to bake. Feed it, mark it, observe the rise, and learn the peak window created by your own flour, ratio, and UK kitchen temperature.
If you want a dependable culture, practical rise-tracking tools, or a starter kit with clear feeding guidance, visit The Sourdough Cult and choose the setup that fits your baking routine. Use the jar mark and the timing notes from this guide to turn your next feed into a repeatable pre-bake check.


