

A complete fermentation starter kit is usually the better choice for a true beginner, while a starter-only bundle suits someone who already owns a jar, scales, and utensils. Since 11% of people in the UK bake at least once a week and 20% bake at least once a month, your baking frequency matters more than the number of accessories in the box.
You may have reached the same point as many new sourdough bakers. You want a warm loaf with a crisp crust, but the instructions seem to begin with a jar of flour and water, followed by several uncertain days of bubbles, smells, and rising levels. A ready-made culture changes that starting point. Instead of cultivating a weak mixture from scratch, you receive a mature, active starter ready for feeding, which can shorten the journey from weeks of uncertainty to days of preparation.
That doesn't mean every kit deserves your money. Some bundles add tools you already have, while others leave out the guidance that makes a living culture manageable. The sensible choice depends on how often you'll bake, what equipment is already in your kitchen, and what you'll do when enthusiasm fades.
Table of Contents
- Why Most Beginners Struggle Before Their First Loaf
- What Comes Inside a Quality Fermentation Starter Kit
- Choosing Between Starter-Only and Complete Kit Bundles
- Your First Week with a Ready-to-Feed Starter
- Maintenance Routines for Different Baking Habits
- Troubleshooting Common Early Challenges
- Building Confidence for Long-Term Baking Success
Why Most Beginners Struggle Before Their First Loaf
A new baker often begins with good intentions. They mix flour and water in a clean jar, mark the level, and wait for the culture to come alive. On the following day, the mixture may look promising. Then the bubbles disappear, a grey liquid forms on top, or an unfamiliar smell raises the uncomfortable question, “Have I ruined it?”
That uncertainty is the genuine difficulty. A starter made from scratch has to establish a stable balance of wild yeasts and bacteria while the baker learns what healthy activity looks like. A cool kitchen can make the mixture appear inactive, while a warm room can make it rise and collapse before the next feeding. The baker isn't only learning to make bread. They're also trying to interpret a small, changing ecosystem.
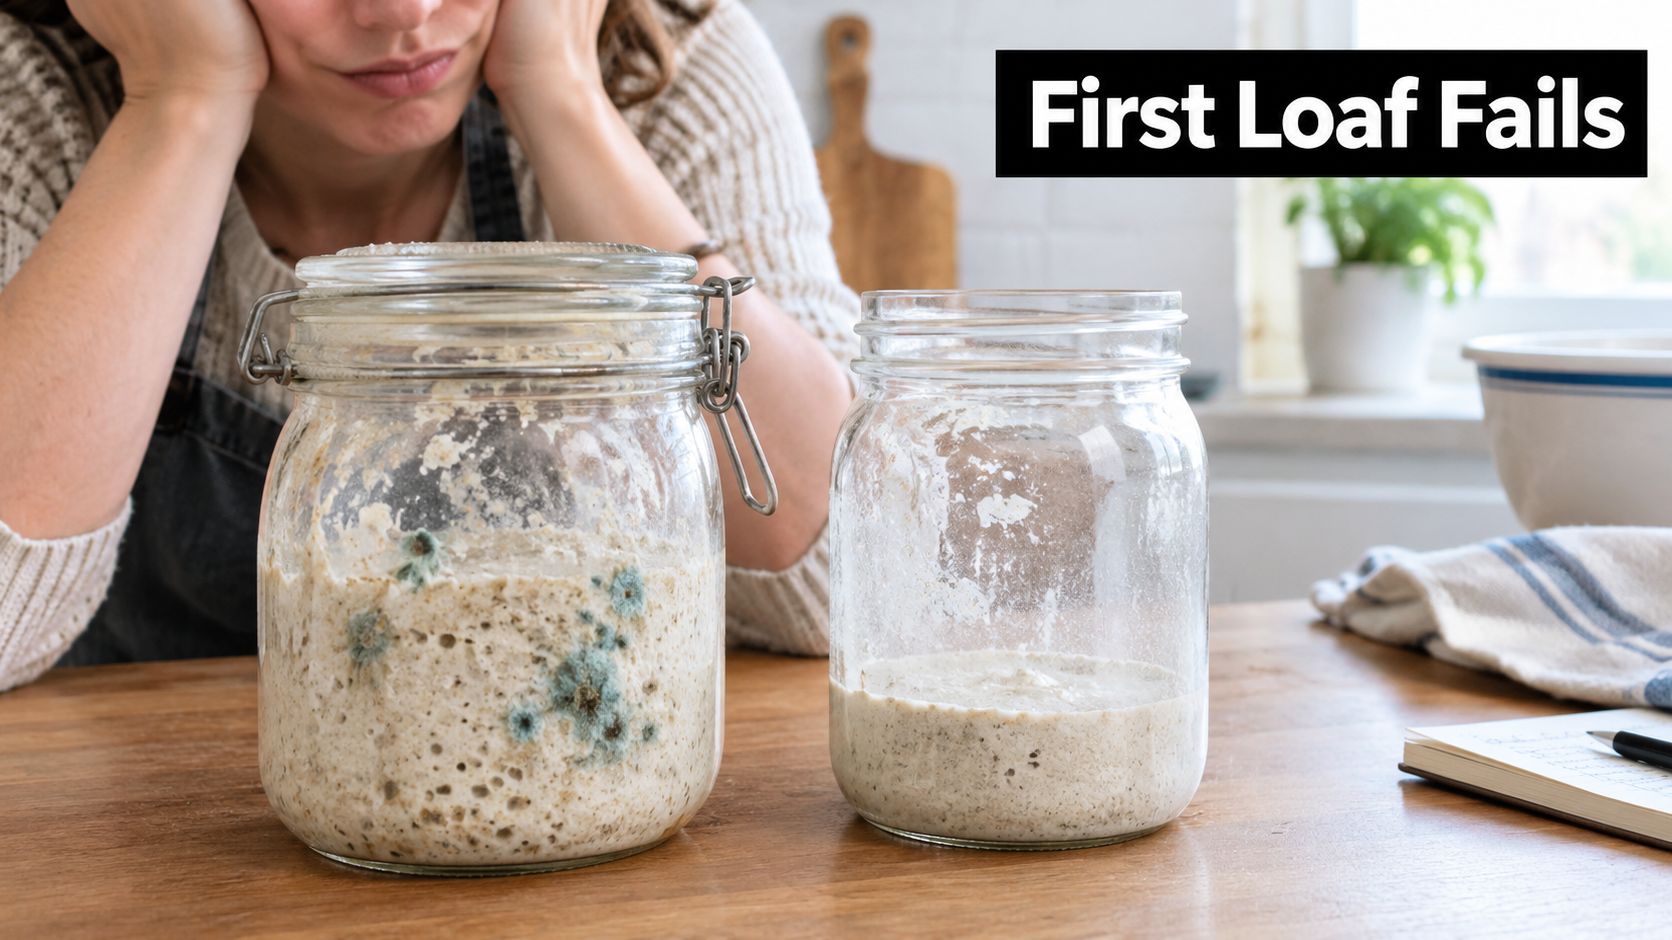
The hidden cost of starting from scratch
Suppose your first attempt rises once, then stops. You add more flour, change the water, move the jar beside the cooker, and begin searching for an explanation. Each adjustment makes it harder to know which change helped. If mould appears, the safe choice is to discard the mixture and begin again.
A mature starter removes much of that early guesswork. It doesn't remove the need to feed the culture or understand fermentation, but it gives you a dependable reference point. You can observe how an active starter smells, how quickly it expands, and what it looks like near its peak. Those visual cues are easier to learn from a living culture that already has momentum.
Practical rule: Your first starter should teach you how to bake, not make you spend your first week wondering whether it is alive.
Temperature remains important even with a ready-made culture. British baking guidance places ordinary yeasted and sourdough dough fermentation comfortably around 24–26°C, with warmer conditions speeding fermentation and cooler conditions slowing it according to UK baking guidance. A starter kit can't control your kitchen, but clear instructions and a marked jar help you respond to it.
What Comes Inside a Quality Fermentation Starter Kit
A quality fermentation starter kit should solve practical problems in a sensible order. First, it needs to provide a viable culture. Next, it should show you how to feed that culture and recognise activity. Only then do extra tools become useful.
Think of the starter as a small household pet. It needs food, a suitable environment, and a routine that fits your life. A jar with clear volume markings helps you see whether it has risen. Feeding guidance tells you how much flour and water to add. Storage instructions prevent you from treating a refrigerated starter as though it were sitting on the worktop.
A mature or heritage culture can also be more useful than an anonymous sample because the kit should explain its condition, care requirements, and expected behaviour. The important question isn't whether the packaging looks attractive. Ask whether the seller gives you enough information to feed, observe, store, and revive the culture without guessing.
The components that earn their place
- Active starter culture: This is the working biological ingredient. A ready-to-feed culture gives a beginner a clearer starting point than flour and water with no established activity.
- Marked glass jar: Volume lines or a rise tracker make fermentation visible. You can mark the level after feeding and watch for expansion, collapse, and peak activity.
- Feeding instructions: Good guidance explains what to feed, when to feed it, and how to adjust the routine when the starter is stored in the fridge.
- Flour for the first feed: A small, suitable flour portion removes one early purchasing decision and helps you follow the first instruction accurately.
- Basic tools: A spoon, scraper, or thermometer may be useful, but only if you don't already own an equivalent item. A kit shouldn't turn simple maintenance into a gadget collection.
| Kit Format Comparison | Best For | Includes |
|---|---|---|
| Starter-only bundle | Bakers who already own basic equipment | Active culture, jar or culture vessel, and care guidance |
| Core beginner kit | First-time bakers who need a simple starting point | Starter, marked jar, initial feeding supplies, and instructions |
| Complete home setup | Beginners with little baking equipment | Starter, jar, measuring or feeding tools, and broader baking guidance |
The bundle is valuable when each component answers a question you will face. A rise tracker answers “when did it peak?” A storage guide answers “what do I do if I won't bake this week?” A scale, if you don't own one, makes feeding repeatable. Anything beyond that should justify its space in your drawer.
Choosing Between Starter-Only and Complete Kit Bundles
You buy a starter kit on Sunday, bake twice the following week, then find the jar untouched by the end of the month. That change in enthusiasm should shape your purchase. The practical question is what do you already own, and how often will you bake? A complete kit is useful when it removes several barriers at once. It is unnecessary when it leaves you with tools you already have or equipment you will rarely use.
For a fuller comparison of formats, see our guide to choosing a sourdough kit in the UK.
A starter-only bundle suits an experienced baker or a confident home cook who already has a digital scale, clean jar, spoon, and suitable flour. That buyer mainly needs a dependable culture and clear care instructions. Buying another set of familiar tools adds cupboard clutter rather than practical help.
A complete kit is more suitable when you are unsure which items matter. One box can reduce shopping decisions, provide a clear starting point, and work well as a gift. Look for a focused bundle with what you need for feeding and early baking. Extra accessories do not make an inactive starter easier to maintain.
Match the bundle to your real routine
The UK market also shows why selective buying matters. One marketplace estimate placed the UK sourdough starter kit market at £630K annually on Amazon UK, with 741K searches a year, while search demand fell 43.5% in the last 90 days in this UK sourdough starter kit market report. These figures indicate interest alongside changing demand, but they cannot decide which format belongs in your kitchen.
Use your likely routine as the test:
- You bake weekly: Choose the culture and tools that make feeding quick and easy to observe. Starter-only may be enough if your kitchen is already organised.
- You bake monthly or less: Give priority to storage and revival guidance. The difficult part will be keeping the culture manageable between loaves, not collecting more baking equipment.
- You are buying a gift: Choose a presentable kit with clear instructions for restarting after a delay. The recipient may enjoy the idea before finding time to bake.
- You already own equipment: Buy only what is missing. A suitable culture or clearly marked jar may help more than another scraper or spoon.
Sourdough interest can still be strong without becoming a weekly habit. Choose for the baker you are likely to be after the initial excitement fades, not only for the enthusiastic baker you hope to become.
Your First Week with a Ready-to-Feed Starter
When the kit arrives, resist the urge to change everything at once. Read the care instructions, check the culture's condition, and stir it as directed. Your first job isn't to produce a perfect loaf. It's to learn how this particular starter behaves in your kitchen.
Set the jar somewhere stable and away from direct heat. Mark the level after feeding, then watch for bubbles, expansion, and the point at which the culture begins to fall. Those observations matter more than a rigid clock because fermentation responds to the temperature of your room and the condition of the starter.
A calm first routine
- Unpack and inspect. Follow the kit's instructions rather than adding flour immediately. Confirm that the culture looks and smells as expected, then stir to distribute any separation.
- Feed with measured ingredients. Use a scale if you have one. Consistent quantities make it much easier to understand whether the starter is becoming more active.
- Mark the starting level. A rubber band, piece of tape, or marked jar turns invisible fermentation into something you can track.
- Watch the room, not just the recipe. A UK guide explains that wild yeasts thrive around 25–30°C, while a cooler 18–25°C range remains workable but slower in its sourdough home guidance. You don't need to force the jar into a hot spot. You need to allow more time when your kitchen is cool.
- Feed according to activity. A starter that has risen and begun to recede may be ready for another feed. A starter showing little movement may need more time, not repeated feeds every few hours.
- Record what you see. Note the room temperature, feeding time, rise, aroma, and texture. This small record becomes your personal fermentation guide.
For a closer explanation of safe feeding habits, use this guide to feeding a sourdough starter without killing it. The useful lesson is consistency. You don't need to handle the culture delicately as if it were fragile glass, but you do need to give it a repeatable routine.
The first successful loaf starts with recognising your starter at its active point, not with memorising a perfect timetable.
Maintenance Routines for Different Baking Habits
You bake every weekend, or the starter has already spent three weeks untouched in the fridge. Those two situations call for different routines, and they may justify different kit choices. Frequent bakers can benefit from a complete fermentation starter kit with a jar, feeding tools, and clear instructions. Occasional bakers may prefer a smaller starter-only setup that creates less washing-up and discard when enthusiasm fades. The best routine follows your real baking pattern, not the promise of a perfect daily habit.
Weekly bakers
Feed the starter in a rhythm that supports your baking day. Keep it somewhere visible, then use the rise marker to recognise when it has become active and when it begins to settle. Retain only the amount your recipe or kit instructions require. A small maintained culture is often easier to handle than a large jar that produces more discard than you can use.
Plan the feeding around your schedule. If you normally bake at the weekend, prepare the starter far enough ahead for it to become active without rushing the process. A visible jar helps because an out-of-sight starter is easy to forget, even when baking is part of your regular routine.
Occasional bakers
Cold storage reduces the attention a starter needs between bakes, but it does not remove the need for care. As the temperature guidance in the first-week section explains, colder storage slows fermentation and lengthens feeding intervals. The temperature ranges described in this guide to sourdough storage temperatures represent different speeds, not different types of starter.
Before baking, return the culture to the active routine supplied with your kit. Look for renewed bubbling and expansion rather than relying on one visual sign. If the starter remains sluggish, continue the revival routine instead of adding large amounts of flour out of frustration.
Gift recipients and fading enthusiasm
A gift starter may be used once and then forgotten during a busy period. That does not mean the purchase was pointless. A useful kit explains how to store the culture, resume feeding, and discard it safely if contamination is suspected.
Keep the jar clean, avoid sealing an actively expanding culture so tightly that pressure builds, and label the last feeding date. That small note gives you a starting point when you return weeks later.
The following video helps visualise the care routine before you begin:
Troubleshooting Common Early Challenges
A separated starter isn't automatically a dead starter. Liquid on the surface can indicate that the culture has used much of its available food, while a slow rise may just reflect a cool room or a starter that needs time to recover. Look at the smell, colour, texture, and pattern of activity together.
If the culture rises and falls quickly, shorten the interval before the next feeding or adjust the amount you maintain. If it barely moves, check whether the room is cool, whether the flour is suitable, and whether you've been discarding so much that too little active culture remains. Change one thing at a time so you can identify the cause.
When to pause and seek help
Mould with an unusual colour or a clearly rotten smell isn't a normal sign of healthy fermentation. Don't scrape the surface and hope the problem has stayed isolated. Follow the supplier's safety advice and replace the culture if the kit includes a viability policy.
A sharp acidic aroma can mean the starter has gone hungry for too long. It doesn't necessarily mean you've failed, but it does tell you that the feeding and storage routine needs attention. This troubleshooting guide on revitalising a sourdough culture is useful when the jar has been neglected and you need a calm recovery process.
Don't judge the starter by one quiet morning. Judge it by whether activity returns after a consistent routine.
The bigger challenge is often not fermentation itself. It's buying a kit for an imagined lifestyle, then abandoning it because the instructions assume you'll bake constantly. A starter-only bundle may be perfectly sensible for an occasional baker, provided its storage guidance is clear. A complete kit may be the better first purchase when uncertainty about tools is the main obstacle.
Building Confidence for Long-Term Baking Success
Your choice can follow a simple principle: buy support for the stage that is most likely to stop you. If you don't own basic equipment, a complete kit removes several decisions. If you already bake and only need a dependable culture, starter-only is more efficient. If you're giving a present, prioritise clear care instructions and an easy route back after a period of neglect.
A fermentation starter kit shouldn't promise that every loaf will be identical. Flour behaves differently, kitchens change temperature, and a starter's activity varies as it moves through its feeding cycle. What the kit can provide is a clear starting culture, sensible tools, and enough guidance to help you interpret those changes.
A practical mental model
Treat the starter as a partner in a routine, not as a test you can pass or fail. Feed it when your baking plans require activity, store it when life gets busy, and watch its behaviour instead of forcing it to follow a timetable designed for another kitchen.
The most useful habits are modest:
- Observe the rise: Use the jar markings to recognise expansion and peak activity.
- Respect temperature: Allow more time in a cool kitchen and avoid placing the culture beside intense heat.
- Choose for frequency: Weekly bakers can maintain an active routine, while occasional bakers need storage and revival guidance.
- Reduce waste: Maintain only what your next bake requires and use discard where appropriate.
- Keep learning: Each feeding teaches you how your flour, jar, room, and starter work together.
A complete bundle can shorten the learning curve, but it won't replace practice. Minimal equipment can produce excellent bread, but only when the baker knows how to use it. Choose the format that makes your next bake easier and your future maintenance realistic.
The Sourdough Cult offers live, active starter, beginner and all-inclusive kits, starter-only options, marked jars, and printed and digital feeding guidance for UK home bakers. Visit The Sourdough Cult to compare the kit format that matches your equipment, baking frequency, and confidence level.


